Minecraft Setup Guides
This page has instructions for how to install Minecraft mod packs and connect to our servers.
First steps
Your first steps are the same regardless of what operating system you have.
-
Get a license for Minecraft: Java Edition.
- Java Edition, specifically, is required to play on our servers. (Bedrock Edition doesn’t support mods.)
- Java Edition is now included as part of Xbox Game Pass for PC.
- If you are having trouble buying Minecraft (i.e. credit card payment issues) see Buying Minecraft for instructions.
-
Apply to be whitelisted on our servers.
Your next steps depend on your computer’s operating system.
- Windows and Mac OS X users - see the instructions for the CurseForge Launcher.
- Linux users (and technically advanced Windows / OSX users) - see the instructions for the MultiMC launcher.
CurseForge Launcher
The CurseForge Launcher is supported on Windows and Mac OS X.
The CurseForge Launcher is the official way to install CurseForge modpacks.
-
Consult the server list for the name of the modpack, and the specific version of the modpack, you need to install.
-
Download and install the CurseForge launcher.
-
Use the CurseForge launcher to install the modpack, as per the screenshot below.
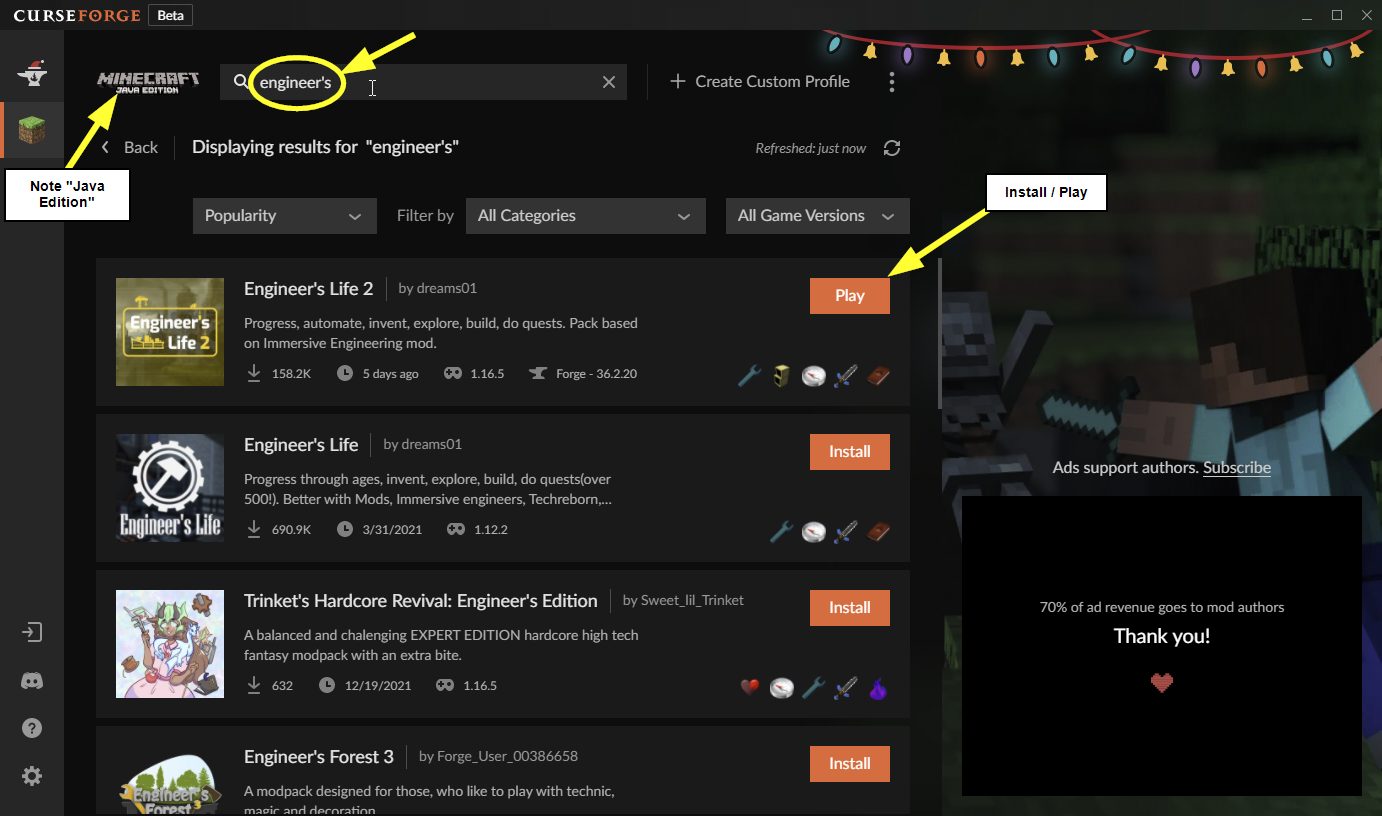
- Check the version of the modpack that has been installed. Ensure this matches the version of the modpack currently running on the server.
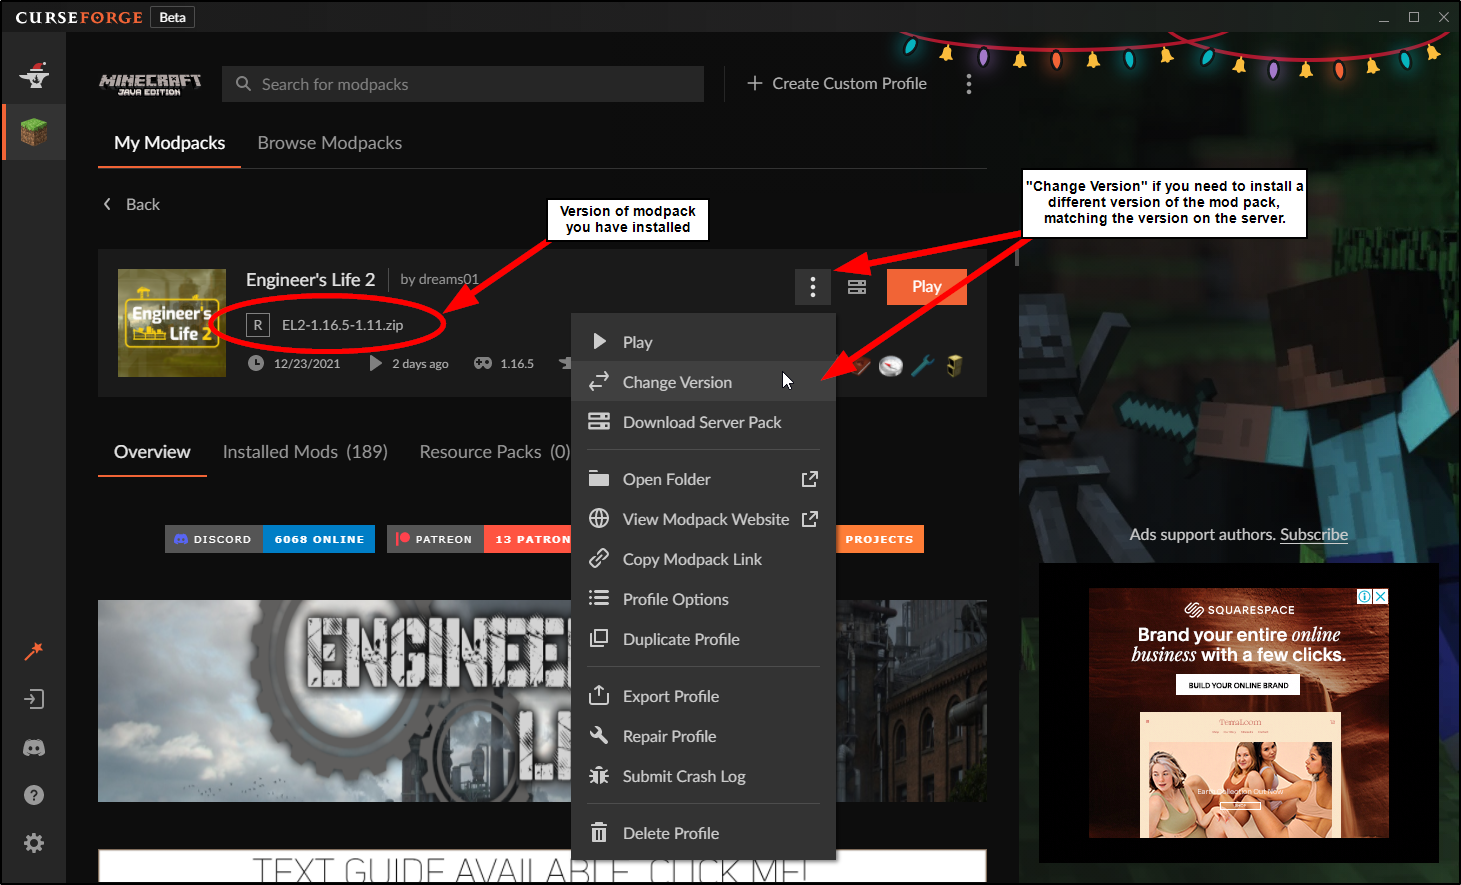
- Use the CurseForge launcher to launch the modpack.
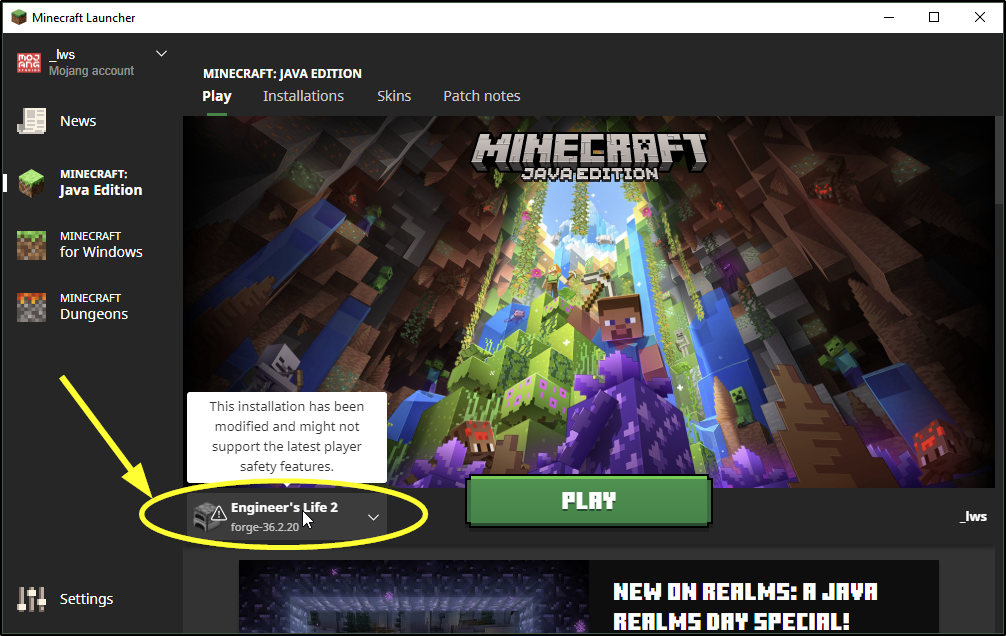
- This will start the normal Minecraft launcher
- You will need to provide your Mojang login or Microsoft login to launch Minecraft.
- Note that the Minecraft “version” will be the name of the modpack, i.e. “Engineer’s Life 2” as shown below.
-
Once the game starts, join our server in the usual way.
- See the server list for the address of the server.
Let us know via email ([email protected]) or on Discord if these instructions need any further development.
MultiMC Launcher
MultiMC is an alternative to the CurseForge launcher.
The main advantage of MultiMC is that MultiMC works on all platforms (Windows, Mac OS X, and Linux), making it the easiest way for Linux users to install Minecraft modpacks.
These screenshots below are from the Windows version of MultiMC. The Mac OS X and Linux versions will look very similar.
MultiMC - download and install
-
Download the Windows, Mac OS X, or Linux version of MultiMC as appropriate. Follow the instructions for installation.
-
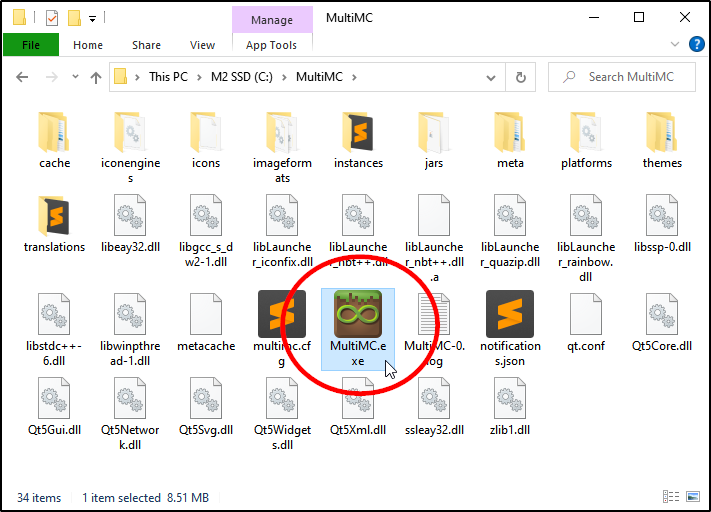
Start MultiMC.
-
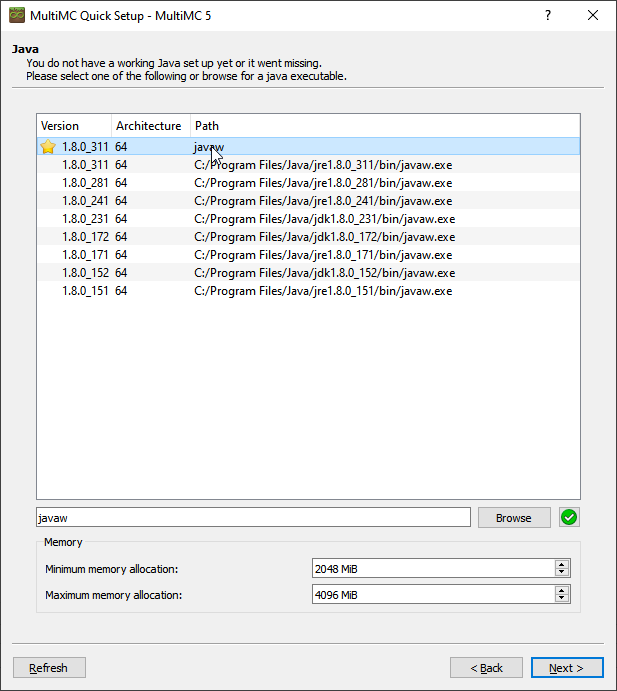
On first starting MultiMC, you may see a screen asking for the location of your Java.
The first option, (marked with a star) is the best option.
MultiMC - account setup
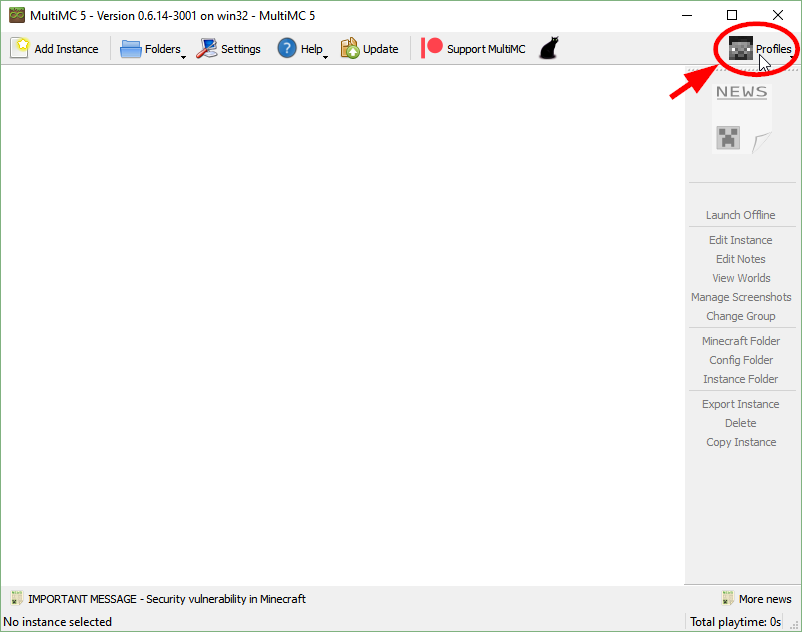
First, set up your Minecraft login. Begin by clicking “Profiles” and then “Manage Accounts”.
Click “Add Microsoft Account” or “Add Mojang Account” as appropriate for the sort of account you have.
- If you bought Minecraft after December 2020, choose “Add Microsoft account”.
- If you have Minecraft via your Xbox Game Pass for PC subscription, choose “Add Microsoft account”.
- Players who bought Minecraft a long time ago may have Mojang accounts.
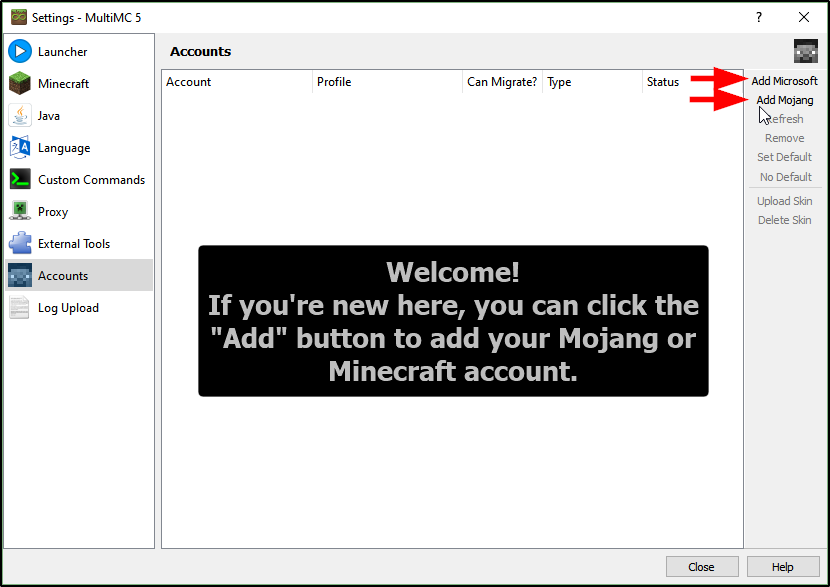
In my case, I still have a Mojang account, so I selected the “Mojang Account” option.
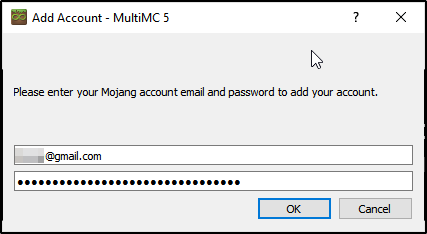
Enter your username (email address) and password in the dialog that appears and click “OK”.
If all goes well, your account will appear in the list of accounts, as shown below.
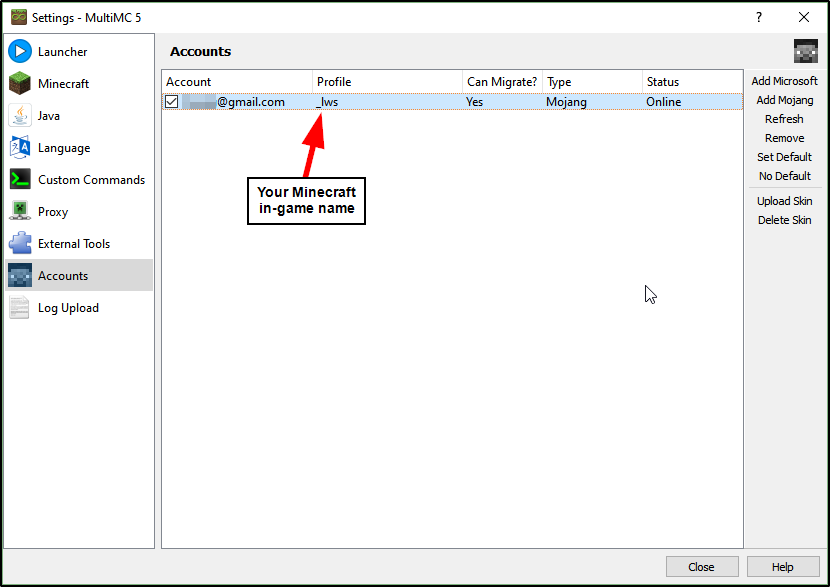
Take note of your “profile name” - this is your in-game name, which you will need to send to us later.
Your in-game name is what we use to add you to the server whitelist.
Close the profile window, returning to MultiMC’s main screen.
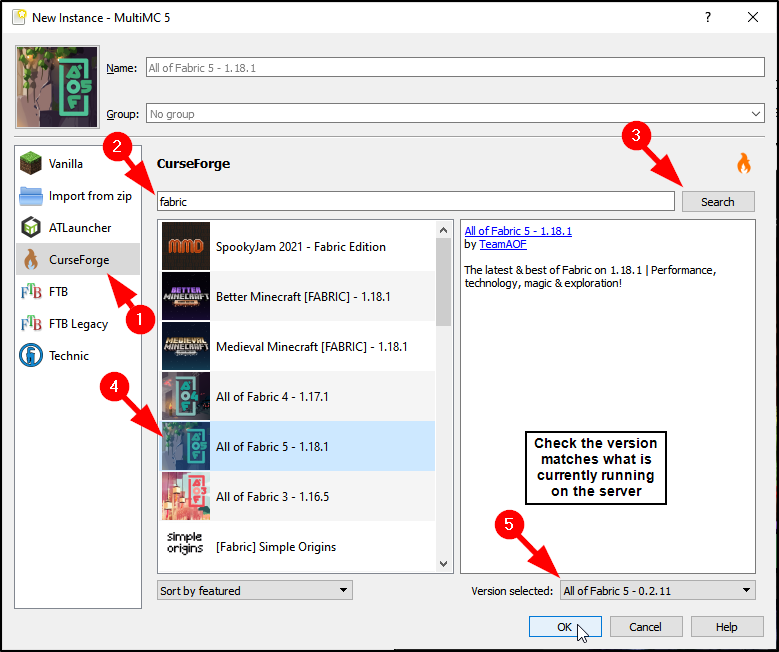
MultiMC - install mod packs
Start by clicking the “Add Instance” button.
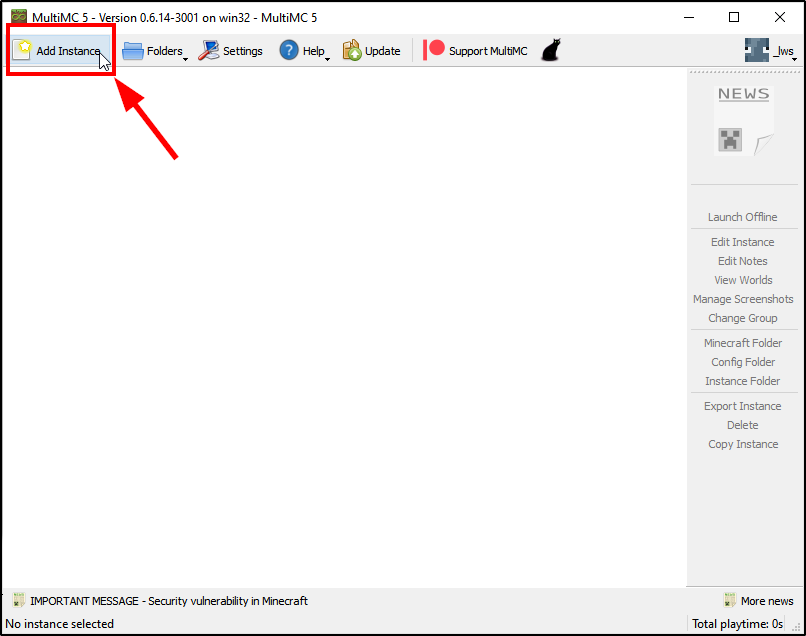
Use the search options to find the modpack appropriate to the server you are joining.
Ensure that the modpack version matches the version currently running on the server.
MultiMC - start the game
Once the modpack is installed, you can launch it:
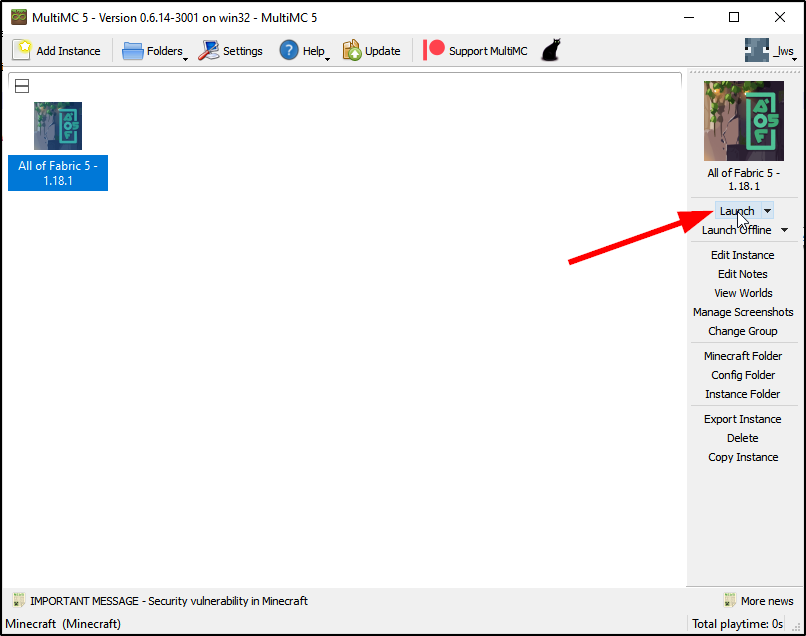
The first launch may take a while due to downloading additional files.
If you get an error regarding your Java version, see Update Java.
Once the game starts, join our server in the usual way.
- See the server list for the address of the server.